Productivity! Oh, yes—the ever-elusive goal of a software developer. No matter how hard you try, trivial tasks always find a way to eat into your deep work time. Grunt is a popular tool that helps automate repetitive code management tasks, but for many developers, creating a practical Gruntfile that fits real-world workflows remains a challenge.
In this article, we share our take on using Grunt to process CSS and JS files automatically. We also hope after reading this post you will feel confident enough to develop your own automated tasks based on Grunt.
- Are you editing .js files while monitoring a gazillion other tasks and the last thing you need is to debug the js code?
- Do you wish you could simply know that tasks such minify and uglify are taken care of automatically?
If you answered yes any of these questions, this article is for you! This article is intended for developers who are pressed for time and expected to deliver good quality code — which makes up most of us. However, even seasoned developers might find the article interesting and a source of inspiration.
Grunt Is Great, But…
You might have learned from your peers about the benefits of using Grunt and using a practical Gruntfile. So you head over to Gruntjs.com, and start reading the usual topics: Getting Started, Installing Grunt. All looks fine, except you wonder “how am I going to use it… NOW?” Do not fret, fellow developer! We created a starting file set that you can download from …
- Create your development folder
- In your development folder, download and unzip the
- In your development folder, which is where you should see the package.json file, open CLI and execute “npm install”.
That’s it! Additional modules have been installed, and you are ready to ask Grunt to execute tasks specified in the practical Gruntfile.
Grunt is a tool that executes a set of actions, including setting up the files and folder. When starting a new web project, developers need to set up the work environment with a common set of folders and files. A practical Gruntfile can simplify this process by automating these repetitive setup tasks.
In this article, we will first cover setting up Grunt on your machine. Second, we will present a set of tasks we find most useful, and will indicate how you can use Grunt to execute those tasks.
Those of you who are not familiar with Grunt, Susy, SASS/SCSS will find this article particularly useful. However, even if you are an expert in this area, glance over the information in this article — even the most astute developer might find something interesting.
Setting up Grunt on Your Machine
To use Grunt on your development machine, make sure you follow these steps:
- Install NODE.JS on your local machine — excellent instructions and download link are at <https://nodejs.org/en/download/>. Make sure “npm” you set up “npm” as a global variable.
- Create the assets and grunt-assets in your project.
- Using the Teminal (on MAC OS) or CMD (Windows), go to grunt-assets folder, and type “npm install” — “npm” is the global variable you created in step 1. To check “npm” is a global variable, type “npm -v”. If all is set up correctly, you will see the npm’s version.

- “npm install” looks into package.json for a list of modules, and will install those modules in the node_modules folder.
- Compile the SCSS using LibSass available at <http://sass-lang.com/libsass>
Using Grunt and Grunt Tasks Collection
The SCSS package contains several basic modules, which will make your life as a developer much easier. Your team and peers will also benefit from using this package by sharing a common set of tools and ensuring code quality on a consistent basis.
The grunt package.json file contains the following modules:
- Grunt: https://gruntjs.com/
- Grunt-contrib-concat: https://github.com/gruntjs/grunt-contrib-concat
- Grunt-contrib-jshint: https://github.com/gruntjs/grunt-contrib-jshint
- Grunt-contrib-uglify: https://github.com/gruntjs/grunt-contrib-uglify
- Grunt-contrib-watch: https://github.com/gruntjs/grunt-contrib-watch
- Grunt-sass: https://github.com/sindresorhus/grunt-sass
- Grunt-concurrent: https://github.com/sindresorhus/grunt-concurrent
- Susy: http://susydocs.oddbird.net/en/latest/install/
- Normalize-scss: https://github.com/JohnAlbin/normalize-scss
- Compass-mixins: http://compass-style.org/index/mixins/
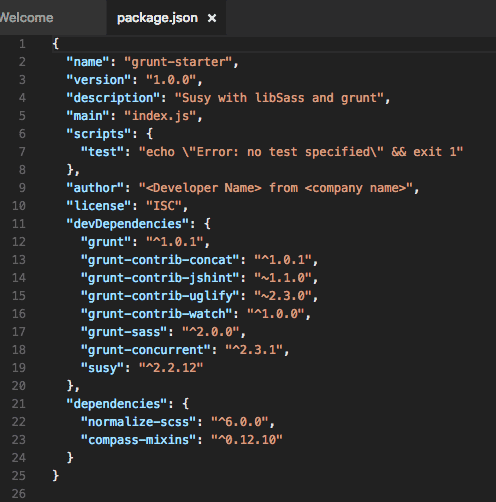
You should look into these additional resources:
- jsHint available alternatives and options: <http://jshint.com/docs/options/>
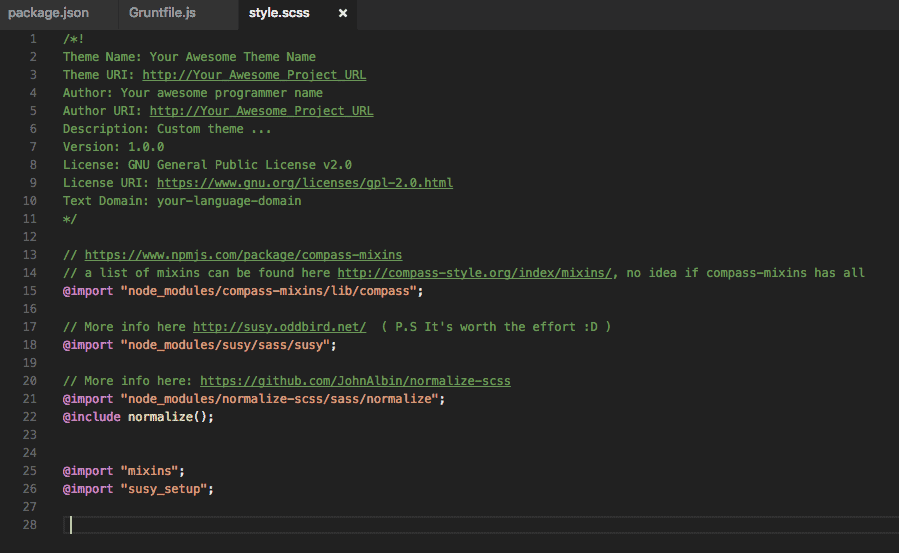
- Using SASS basics and use of mixins, visit <http://sass-lang.com/guide> to learn about creating mixins, writing scss expressions such as @if, @for, @each, @while, and building functions with… @function.
Grunt Is Watching You…
Grunt monitors activity on specific file types and performs the tasks associated with those file types. For example, say you’re working on a .scss or .js file and you make a change. Grunt will detect that change and automatically compile the file into its corresponding .css or minified .js version—so you no longer have to worry about remembering to compile before running your project.
How does this work, you wonder? The Grunt Concurrent module creates two threads: one to monitor JavaScript files and another to monitor SCSS files. Any change in a SCSS file triggers the Grunt Watch module for SCSS. Similarly, any change to a JavaScript file—or the creation of a new one—activates the Watch module for JavaScript. Each watch event is linked to a task that compiles the modified file.
As a result, both SCSS and JavaScript files are compiled immediately after a modification. With a practical Gruntfile in place, this automation becomes seamless, making your workflow faster and more efficient.
Good Practices
Before using the basic package indicated above:
- Open the gruntfile.js and package.json files.
- Replace the generic nameholders with your name.
- Replace <Developer Name> with your company name.
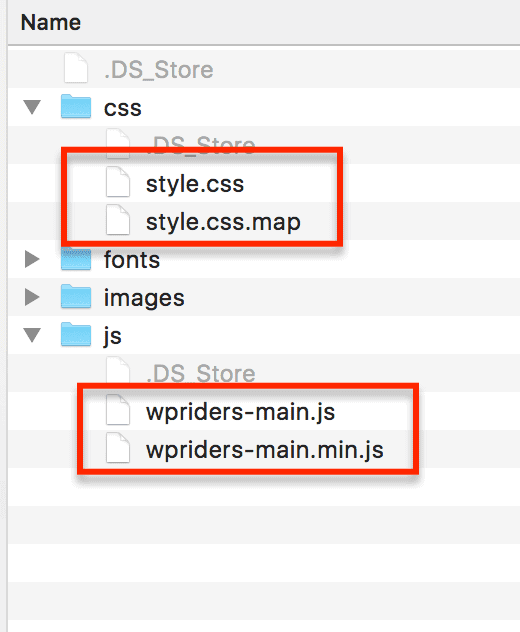
- Optionally, change the compiled filenames, e.g. wpriders-main.js, wpriders-main.min.js
Please keep in mind that javascript files will be compiled and minified in alphabetical order. We also recommend that you prefix your own javascript file with the letter “z” (z_my_awesome_js_code.js) to ensure it will be compiled last and use the resources of other JS libraries currently available in the project.
Give It A… Grunt
At this point, you have everything you need to automate tasks using a practical grunt file.
In the same folder where gruntfile.js resides, type “grunt”. Magic happens!
Interesting Screenshots

At WPRiders, we know your website isn’t just a project—it’s part of your business engine ⚙️. That’s why we offer more than just code. From thoughtful WordPress custom development to dependable monthly WordPress maintenance, we’re here to support what matters most. Whether you’re planning a new build with custom WordPress website development 🛠️, looking for a reliable WordPress consultant 🧠, need and Elementor developer,or need ongoing support through our WordPress development service, we’d love to explore how we can work together.
If that sounds like what you need, 👉 Schedule a Free Discovery Call and let’s talk about your next move. We’re always up for a good conversation.


